
Shoppers expect quick and accurate shipping estimates. Shopify Shipping Profiles allow sellers to incorporate shipping zones, inventory locations, and shipping policies into the location(s) assigned for fulfillment. Marketplace Management will sync your Shopify Locations with Marketplace Management Fulfillment Centers so that your Shopify orders are fulfilled as defined in Shopify and inventory quantities are synced to the appropriate locations.
How to Setup Shopify Multi Location Support - Connecting a New Shopify Integration
If you are a new Marketplace Management customer setting up integrations for Shopify and other sales channels for the first time, follow the steps below.
If you use 3rd party fulfillment services like FBA, we recommend integrating those first so that your inventory quantities are synced with Marketplace Management. Check out the links below for help on setting up 3rd party fulfillment services:
- https://www.selleractive.com/support/how-to-add-a-fulfillment-center-or-location-to-your-listings
- https://www.selleractive.com/support/amazon/integration-settings/cross-channel-fulfillment-for-amazon-fba-sellers
- https://www.selleractive.com/support/required-steps-to-get-started-with-selleractive-and-deliverr
- https://www.selleractive.com/support/deliverrsetupvideo
We do not currently support mapping a custom fulfillment service Location into Marketplace Management for inventory tracking.
Transition your 3rd party app in Shopify to a Location:
While Marketplace Management will be responsible for sending the order information to the 3rd party, you’ll still want a Shopify Location to represent the quantities so that you can manage fulfillment priority within Shopify.
- Create a Location in Shopify to represent the quantity stored within the 3rd party fulfillment center that’s now connected in Marketplace Management (don’t worry about setting quantity).
- You can leave the address fields blank when creating Shopify locations for 3rd party fulfillment services


After you’ve transitioned 3rd party fulfillment service apps, you can connect your Shopify store to Marketplace Management:
- Select Add Sales Channel within Settings > Integrations
- Select Shopify and input your Shop Name
- Select Multi-Location when asked how you want to fulfill online orders
- Click I’m Ready to Continue to begin linking Shopify Locations to Marketplace Management Fulfillment Centers
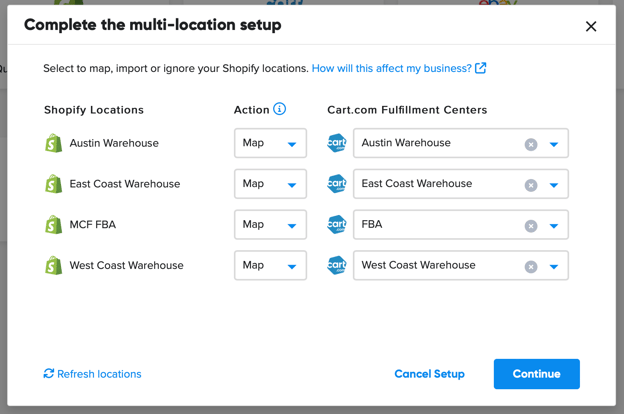
- All of your Shopify locations will appear for mapping. If you don’t see a location, hit the Refresh Locations button.
- When linking Shopify Locations to Marketplace Management Fulfillment Centers, you have a few options:
- Map the Location to a Fulfillment Center - link the Shopify Location to a Marketplace Management Fulfillment Center. Inventory quantities for Shopify listings are derived from the Marketplace Management Fulfillment Center. Select this option to link a Shopify Location to a 3rd party fulfillment service in Marketplace Management with up to date inventory quantities.
- Import the Location as a Fulfillment Center - Create a new Marketplace Management Fulfillment Center using the Name, Address, and inventory quantities from the Shopify Location. Select this option to import 1st party warehouses and their inventory quantities for into Marketplace Management.
- Alternatively, you can Ignore a Shopify Location. This won’t associate it to any Fulfillment Centers within Marketplace Management and inventory will go untracked for products stocked in and orders fulfilled by that location.

- After linking Shopify Locations to Marketplace Management Fulfillment Centers, you have the option to set a new default warehouse for all channels.
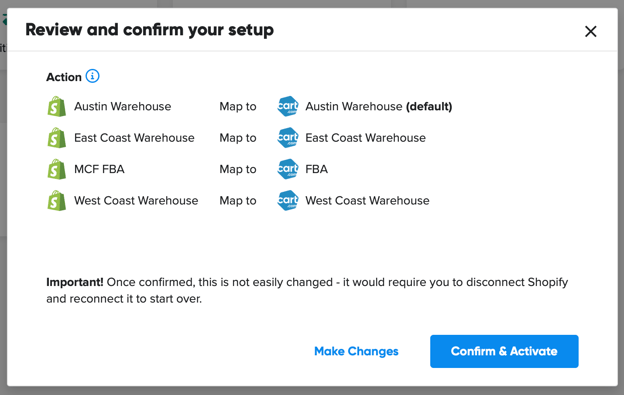
- Finally, you’ll be presented with a confirmation of your mapping selections. If something doesn’t look right, click the Make Changes button to go back to the mapping screen.
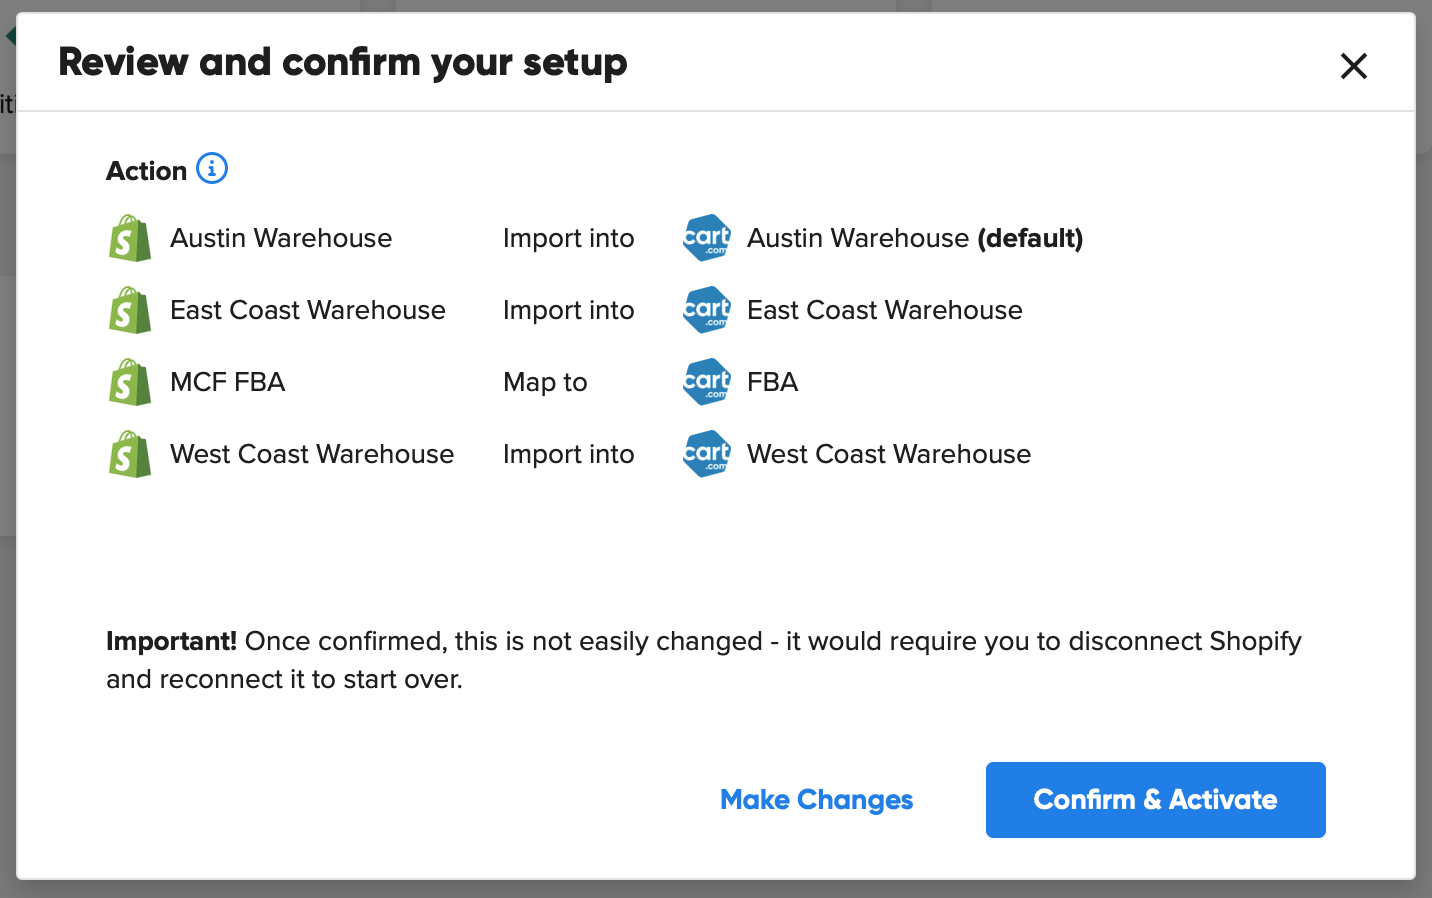
- Click Confirm & Activate when you’re ready to sync quantities between Shopify Locations and Marketplace Management Fulfillment Centers. Be sure the mapping is to your preferences. You will not be able to make changes unless you remove your Shopify integration and reauthorize it.
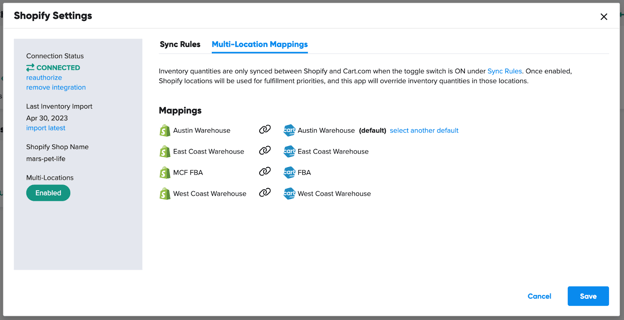
- You can view your mappings by clicking the Multi-Location Mappings tab in your Shopify integration settings.
- Now that Shopify is integrated as a Sales Channel, input your FBA mappings in the Cross Channel Shipping section of your FBA settings.
How to Setup Shopify Multi Location Support - Configure an Existing Shopify Integration
If you currently have your Shopify store connected to Marketplace Management and want to move to a multi-location setup, please note of a few key changes:
- The Location assigned for fulfillment for each order item will now be determined by Shopify.
- When you go through the setup process, we’ll pause importing and exporting orders and inventory so that you can have a chance to set up the new locations in Shopify. Incoming orders will be assigned a location by Shopify.
- When you create new locations in Shopify, don’t worry about connecting any apps for 3rd party fulfillment services like Flexport (formerly Deliverr). We will still send your order information to the 3rd party. You will just rank the fulfillment priority order within Shopify.
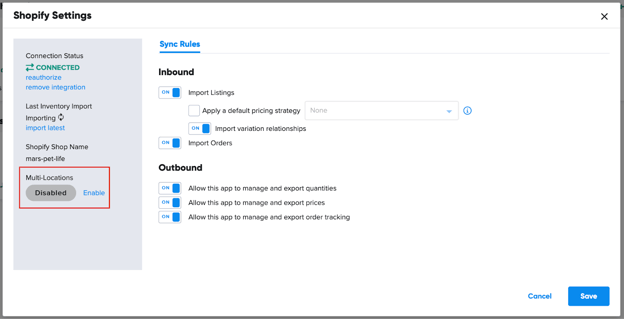
- The Outbound setting “Allow this app to manage and export quantities” will be automatically set to ON once you complete the setup. This will allow your locations to have up to date quantities in Shopify.
For detailed instructions, please follow these steps:
- Navigate to your Shopify integration Settings. Settings > Integrations > Shopify.
- Click the Enable button under Multi-Locations on the left side settings panel.
- Once the Enable button is clicked, we will pause importing Shopify orders so that they can follow the new order assignment defined in Shopify. If you receive any Shopify orders during the setup, they’ll import into Marketplace Management with a location assigned by Shopify (once the setup is complete).
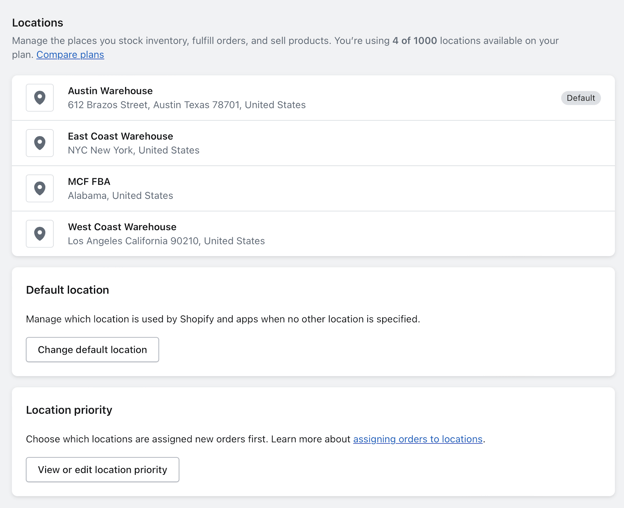
- From here, you will be prompted to create new locations in Shopify. Be sure to include the warehouse address and order them based on the priority you want orders fulfilled (don’t worry about setting quantity).
- For 3rd party fulfillment services, you do not need to connect an app to send the order information. That will be done through your integrations already set up within Marketplace Management.
- You can leave the address fields blank when creating Shopify locations for 3rd party fulfillment services.
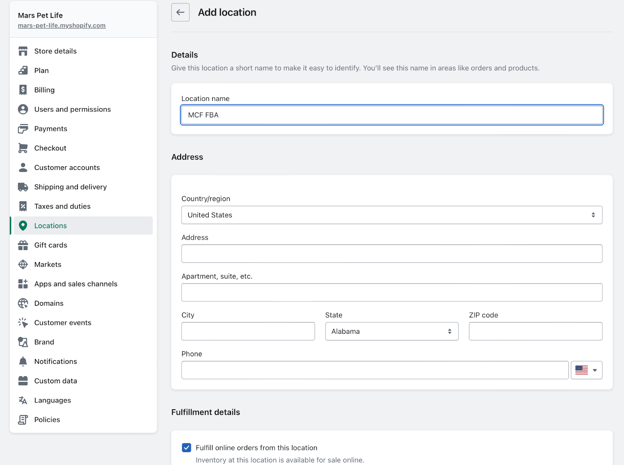
- You can leave the address fields blank when creating Shopify locations for 3rd party fulfillment services.
- Once you’re done creating new locations in Shopify, head back to Marketplace Management and click I’m Ready to Map.
- All of your Shopify locations will appear for mapping. If you don’t see a location, hit the Refresh Locations button.
- When linking Shopify Locations to Marketplace Management Fulfillment Centers, you have a few options:
- Map the Location to a Fulfillment Center - link the Shopify Location to a Marketplace Management Fulfillment Center. Inventory quantities for Shopify listings are derived from the Marketplace Management Fulfillment Center. We recommend selecting this option as Marketplace Management already has your up to date inventory quantities.
- Import the Location as a Fulfillment Center - Create a new Marketplace Management Fulfillment Center using the Name, Address, and inventory quantities for new SKUs from the Shopify Location.
- Alternatively, you can Ignore a Shopify Location. This won’t associate it to any Fulfillment Centers within Marketplace Management and inventory will go untracked for products stocked in and orders fulfilled by that location.
- After linking Shopify Locations to Marketplace Management Fulfillment Centers, you have the option to set a new default warehouse for all channels.
- Finally, you’ll be presented with a confirmation of your mapping selections. If something doesn’t look right, click the Make Changes button to go back to the mapping screen.
- Click Confirm & Activate when you’re ready to sync quantities between Shopify Locations and Marketplace Management Fulfillment Centers. Be sure the mapping is to your preferences. You will not be able to make changes unless you remove your Shopify integration and reauthorize it.
- You can view your mappings by clicking the Multi-Location Mappings tab in your Shopify integration settings.
After the initial setup, it can take up to 20 minutes for inventory quantities to be in all Shopify Locations.
Creating new Fulfillment Centers and Location Mappings
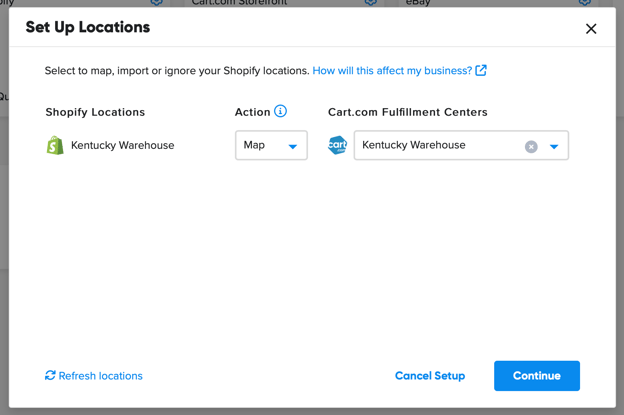
When a new Location is detected from Shopify, we’ll ask how you want to handle it within Marketplace Management:
Click Review on the notification and you’ll have a few options:
- Map the Location to a Fulfillment Center - link the Shopify Location to a Marketplace Management Fulfillment Center. Inventory quantities for Shopify listings are derived from the Marketplace Management Fulfillment Center.
- Import the Location as a Fulfillment Center - Create a new Marketplace Management Fulfillment Center using the Name, Address, and inventory quantities for new SKUs from the Shopify Location.
- Alternatively, you can Ignore a Shopify Location. This won’t associate it to any Fulfillment Centers within Marketplace Management and inventory will go untracked for products stocked in and orders fulfilled by that location.

Transferring Inventory & Fulfillment Center Status
When transferring inventory quantities from one Fulfillment Center to another, we always recommend making the changes in Marketplace Management vs. Shopify since we will only import quantities from Shopify for new Locations and products.
Transfer inventory between Fulfillment Centers that are already linked to Shopify Locations:
- Perform a bulk inventory update for removing and adding new quantity at the relevant warehouses.
- Your Locations will be updated with the correct quantities.
- Deactivate any Locations that are no longer used in Shopify. You will not be prompted to transfer inventory since the updates were already pushed as a result of step 1.
Transfer inventory to a new warehouse:
- Create a new warehouse in Marketplace Management.
- Perform a bulk inventory update for removing and adding new quantity at the relevant warehouses.
- Create a new Location in Shopify to represent the new warehouse. Create or update any shipping profiles to include the new warehouse.
- Map the Location to the Marketplace Management warehouse.
- Deactivate any Locations that are no longer used in Shopify. You will not be prompted to transfer inventory since the updates were already pushed as a result of step 1.
Transfer inventory to a new 3rd party Fulfillment Service:
- Perform a bulk inventory update for removing quantity at the relevant warehouses.
- Update inventory quantities within the 3rd party fulfillment service.
- Your Shopify Locations will be updated with the correct quantities since they’re linked with Marketplace Management Fulfillment Centers.
- Deactivate any Locations that are no longer used in Shopify. You will not be prompted to transfer inventory since the updates are already reflected.